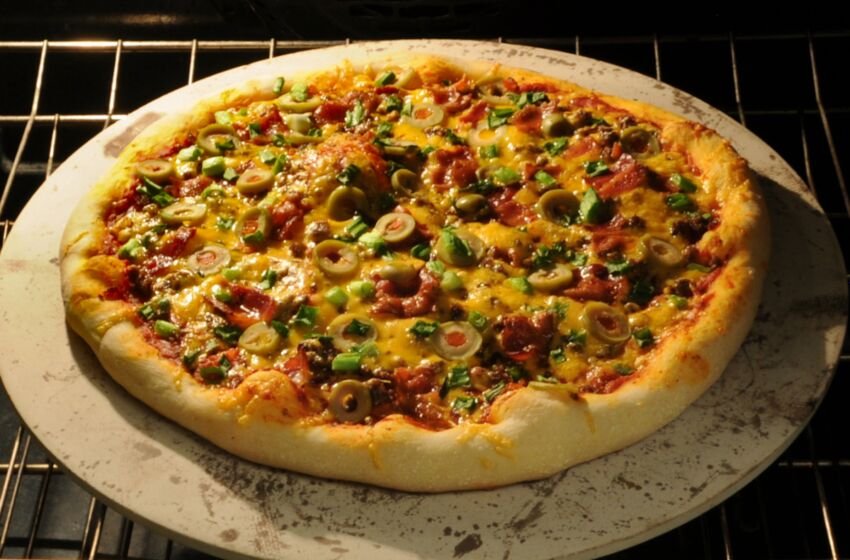
For those of you who aren’t good-looking, this recipe might be your ticket to popularity. It’s worked wonders for me.
Not all pizza crusts are created equal, (but you knew that already.) Some are chewy, some are soft, others are thick or thin as you like them. And unless you have it down to a science, a home-made crust is as like as not to turn out a little differently every time you make it.
But we’re going for something specific here: a nice, chewy crust that bakes thoroughly without any soggy spots. Now some of this will be down to how well you shape it and how well you bake it, but this recipe is the foundation for getting those results.
A few words of warning before we begin: this crust requires a sourdough starter, and you’ll have to plan ahead for when you want to make it. Secondly, ingredients matter. Use a different flour, get a different result. This recipe was refined using Robin Hood Homestyle White “Best for Bread” flour.
For the active starter, I generally use whole wheat flour at 2/3 hydration.
- Make in Advance
Sourdough Starter - Preparation Time
5 minutes
Ingredients
- 1 oz (28 g) active starter
- 3 oz (85 g) water
- 4 oz (115 g) bread flour
Instructions
- Combine water with the active starter. Use a whisk or your hands to break it up.
- Add bread flour and mix/knead until well combined into a smooth ball of dough.
- Cover and leave at room temperature for 6-8 hours, until dough has risen or has an acidic aroma.
- Preparation Time
30 minutes - Serves
6-8 adults - Difficulty
Moderate
Wet Ingredients
- 8 oz (226 g) sourdough starter – all of it
- 10.5 oz (298 g) water, warmed to 35°C
Dry Ingredients
- 18 oz (510 g) bread flour
- 0.5 oz (14 g ) salt
- 1 oz (28 g) sugar
- 0.11 oz (3 g) instant yeast
Add Last
- 1 oz (28 g) olive oil
Instructions
- Combine water and sourdough starter. Use your hands to break it up as best you can.
- In a separate bowl, combine dry ingredients.
- Using a stand mixer on low speed, combine wet and dry ingredients. You might start out with the paddle attachment, but you will soon need the dough hook.
- Add the olive oil shortly after the other ingredients, before they are completely combined. Otherwise it will be difficult to knead into your dough.
- Continue mixing for about a minute or two until everything is combined.
- Let it rest for 5-10 minutes.
- Using the dough-hook, mix on medium-low speed for about 3 minutes. By this point you should have a shape-able ball of dough.
- Gently knead by hand for 30 seconds or a minute.
- Let the dough rest for another few minutes.
- Divide the dough into equal parts. It will make 2 large pizzas.
- Round each portion tightly into a ball, place in closed container or covered bowl, and refrigerate for 1 or 2 days. Make sure the container is large enough to accommodate the rise.
Shaping and Baking
When pizza day arrives, you’ll remove your dough from the refrigerator several hours in advance. Gently stretch and fold each dough ball and re-roll into a ball. Let it sit out – covered – until you are ready to use it. Use this time to ensure all your toppings are ready to go.
You’ll want to pre-heat your baking stone for a good 45 minutes for best results. Place it in the oven on an upper-middle rack, and set your oven as hot as it will go – typically 550°F.
Shaping the pizza crust can be a bit of a challenge if you’ve never done it before. We’ve all seen those guys on TV tossing and spinning their dough until it transforms into a perfectly even disc. Unless you’re a seasoned pro, that isn’t going to happen, so don’t be disappointed when it doesn’t. Instead, find a method that works for you.
It goes without saying that you’ll need some flour on the dough and on your hands to keep things from getting too sticky. You’ll first want to press the dough down into a rough circular shape. Using your fingers, press and stretch the area between the centre and the edges. Leave a little rim at the outside edge, and don’t stretch out the centre just yet. Next you can pick up the dough and drape it over your hands. Make your hands into a circle and gently stretch out the dough on top of your knuckles, rotating as you go. If you find you have an uneven thickness, just flop it down on the counter and press it out a bit in the thicker areas. If it gets too shrinky, set it aside and work on the next one. It should be more stretchable when you get back to it.
Toppings are up to you. Some people put olive oil under the sauce – don’t do this. I’ve tried it, and it’s better without. Generally I start with sauce, follow with meat, then cheese, and the vegetables go on last. But I won’t hold it against you if you do it differently.
 It won’t take long to bake – 10 minutes or less for the first one. Just keep an eye on it. You can peak underneath and make sure the bottom is browned before taking it out. The second pizza might take a little longer, since the baking stone won’t be as hot. At least let your oven get back up to temperature before putting the next one in.


